Turn Any GitHub Repository Into a System Design Course: This Open Source Project Makes It Happen
Have you ever done this: When taking over a project, you just get it running first. When you encounter a bug, you add some logs. When you see a new PR, you merge it. But a year later, if someone asks you how the project architecture is designed, you can't answer?
It's not just you. Most programmers understand system design through "usage" rather than "study."
01 The Problem: Why Can't You Get Started with System Design No Matter How Much You Learn?
Many people learn system design by:
- Reading through "System Design Interview";
- Memorizing a few classic cases (design Twitter, design Uber);
- Reading a few architecture blog posts before interviews.
And the result?
When the interviewer asks, "What message queue does your current project use, and why was it chosen?" all you can say is, "Someone else made that choice."
The real problem isn't that you lack system design knowledge — it's that you've never used source code evidence to understand the architecture of a real system.
The code you write, the bugs you fix, the features you add — these are all system design material. What you're missing is a method to tie them all together.
02 What Is This Project? In One Sentence
This project is called Repo System Design Skills, a set of Skills designed for AI coding assistants (Codex / Claude Code).
Its goal isn't to have an Agent write code for you, but to turn the Agent into a source-code-evidence-driven system design tutor.
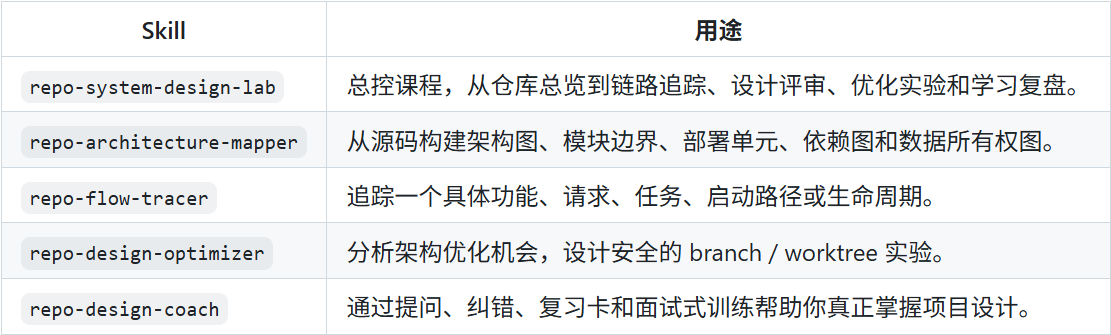
In one sentence: It turns any GitHub repository into a system design course.
03 What Old Problem Does It Solve?
Let's first look at what it's like to use an Agent to learn a project without it.
You Might Ask an Agent Like This
Help me look at the architecture of this project.The Agent will give you something that sounds reasonable:
- "This project adopts a layered architecture..."
- "The frontend uses React..."
- "The backend uses Spring Boot..."
It all sounds correct, but it doesn't cite any source code. You don't know whether it's reading the code or making things up.
Worse Still
| Question | Normal Agent Answer | This Skill's Answer |
|---|---|---|
| How is the architecture layered? | Template response | Cites specific files and directories |
| Core flow | Vague generalization | Tracks from entry to database, every step with source code |
| Design trade-offs | Gives conclusions only | Distinguishes Evidence / Inference / Open Question |
| Optimization suggestions | May propose full rewrite | Validates first, experiments safely with branches |
| Learning effectiveness | Forget after hearing | Tests you, corrects mistakes, creates review cards |
The core innovation of this project isn't "helping you read code" — it's establishing a complete methodology for an Agent to teach you system design.
04 Five Skills, One Complete Learning Loop
The project contains 5 Skills, corresponding to 5 levels of system design learning.
                   ┌──────────────────┐
                   │  repo-system-    │
                   │  design-lab      │  ← Master: plan the learning path
                   └────────┬─────────┘
                            │
                   ┌────────▼─────────┐
                   │  repo-           │
                   │  architecture-   │  ← Architecture map: module boundaries,
                   │  mapper          │    dependencies, data flow
                   └────────┬─────────┘
                            │
                   ┌────────▼─────────┐
                   │  repo-flow-      │
                   │  tracer          │  ← Flow tracing: from UI to DB,
                   └────────┬─────────┘    trace the complete path
                            │
                   ┌────────▼─────────┐
                   │  repo-design-    │
                   │  optimizer       │  ← Optimization review: find bottlenecks,
                   └────────┬─────────┘    design experiments
                            │
                   ┌────────▼─────────┐
                   │  repo-design-    │
                   │  coach           │  ← Coach mode: quiz you, interview training
                   └──────────────────┘
Skill 1: repo-system-design-lab (Master Lab)
This is the entry point. It doesn't do direct analysis; it creates a learning plan.
When you tell it "I want to learn this project," it will:
- Read the README, configuration, and directory structure, output a project overview;
- Find the entry point, core modules, and external dependencies;
- Recommend 3-5 core flows worth deep study;
- Never modify a single line of code until you confirm.
Skill 2: repo-architecture-mapper (Architecture Map)
This Skill "draws" your project.
- Layered architecture diagram
- Runtime / deployment diagram
- Data ownership diagram
- Dependency diagram
- Fake / Real mode switching diagram
Every diagram has source code evidence. It doesn't just draw boxes — it tells you "this module's code is in src/services/, entry point at main.go:42."
Skill 3: repo-flow-tracer (Flow Tracing)
This one is the most practical in my opinion.
Say you want to understand the "user login → authentication → token issuance" flow:
Streamlit page (app.py:120)
  → Call LoginUseCase (application/auth.py:45)
    → UserRepository queries user (domain/models.py:200)
      → Postgres or InMemory adapter (infrastructure/repositories.py:88)
        → JWT Token generation (infrastructure/auth.py:30)
          → Return result to page
Every step tells you the file location and line number. You can follow along in your editor.
Skill 4: repo-design-optimizer (Design Optimizer)
When you want to optimize a project, this Skill will:
- Scan across 6 dimensions (performance, reliability, scalability, maintainability, observability, security);
- Attach source code evidence, impact level, priority, and optimization plan to each issue;
- Design a validation plan first, then modify code;
- Automatically suggest branch or worktree strategies, with rollback preparation.
Having a validation plan before actually changing code is a habit that will save you many times.
Skill 5: repo-design-coach (Learning Coach)
This is the most unique one — it tests you instead of teaching you.
- Asks one question at a time;
- After you answer, it corrects you with source code evidence;
- Progresses from Level 1 to Level 5;
- Helps you develop interview-ready expression.
05 Technical Architecture: How Does This Project Work?
This project itself is worth studying. It's designed not for "human readers" but for AI Agents.
repo-system-design-skills/
  codex/
    skills/                 # Codex format, includes agents/openai.yaml
      repo-system-design-lab/
      repo-architecture-mapper/
      repo-flow-tracer/
      repo-design-optimizer/
      repo-design-coach/
  claude/
    skills/                 # Claude Code format, SKILL.md + references
      repo-system-design-lab/
      repo-architecture-mapper/
      repo-flow-tracer/
      repo-design-optimizer/
      repo-design-coach/
Notable Design Highlights
Highlight 1: Dual Platform Compatibility
The same methodology works on both Codex (OpenAI) and Claude Code. The Skill logic is identical across the two versions, differing only in format (Codex needs agents/openai.yaml metadata, Claude uses SKILL.md).
Highlight 2: Layered Skill Design
Adopts a three-layer approach: "Master + Specialized Execution + Reverse Teaching," each with a clear purpose:
- The master layer orchestrates the learning workflow;
- Specialized Skills handle deep analysis in individual domains;
- The coach Skill validates learning outcomes.
Highlight 3: Citation-Driven Evidence Chain
Every architectural conclusion must cite source files. This is the most valuable design of this Skill set — it forces the Agent to read code rather than fabricate conclusions.
Highlight 4: Distinguishing Evidence / Inference / Open Question
This is the design detail most worth mentioning in an interview. Not all conclusions can be determined from source code alone — distinguishing these three states is a sign of mature system design thinking.
06 Core Challenges: What Makes Building a Skill That Teaches People Difficult?
Challenge 1: Agents Tend to Fabricate
An Agent's nature is to generate text that looks reasonable, not to reason rigorously.
This project's solution: Mandate that every architecture conclusion cites source code files and line numbers. If the Agent can't cite source code, it doesn't count as Evidence — only Inference.
Challenge 2: Agents Struggle with "Read-Only" Boundaries
When asked about a project, Agents always want to write code.
This project's solution: Explicitly declare "Non-Negotiables" in the Skill documentation, including "no code modification during the learning phase."
Challenge 3: Learning Effectiveness Is Hard to Validate
The traditional "have the Agent lecture you" approach leads to forgetting right after learning.
This project's solution: Use the coach Skill for reverse teaching — have the Agent quiz you.
07 How to Use It? A Complete 10-Round Tutorial
The project includes a complete example tutorial using the real open-source project Kstheme/Study-Planner.
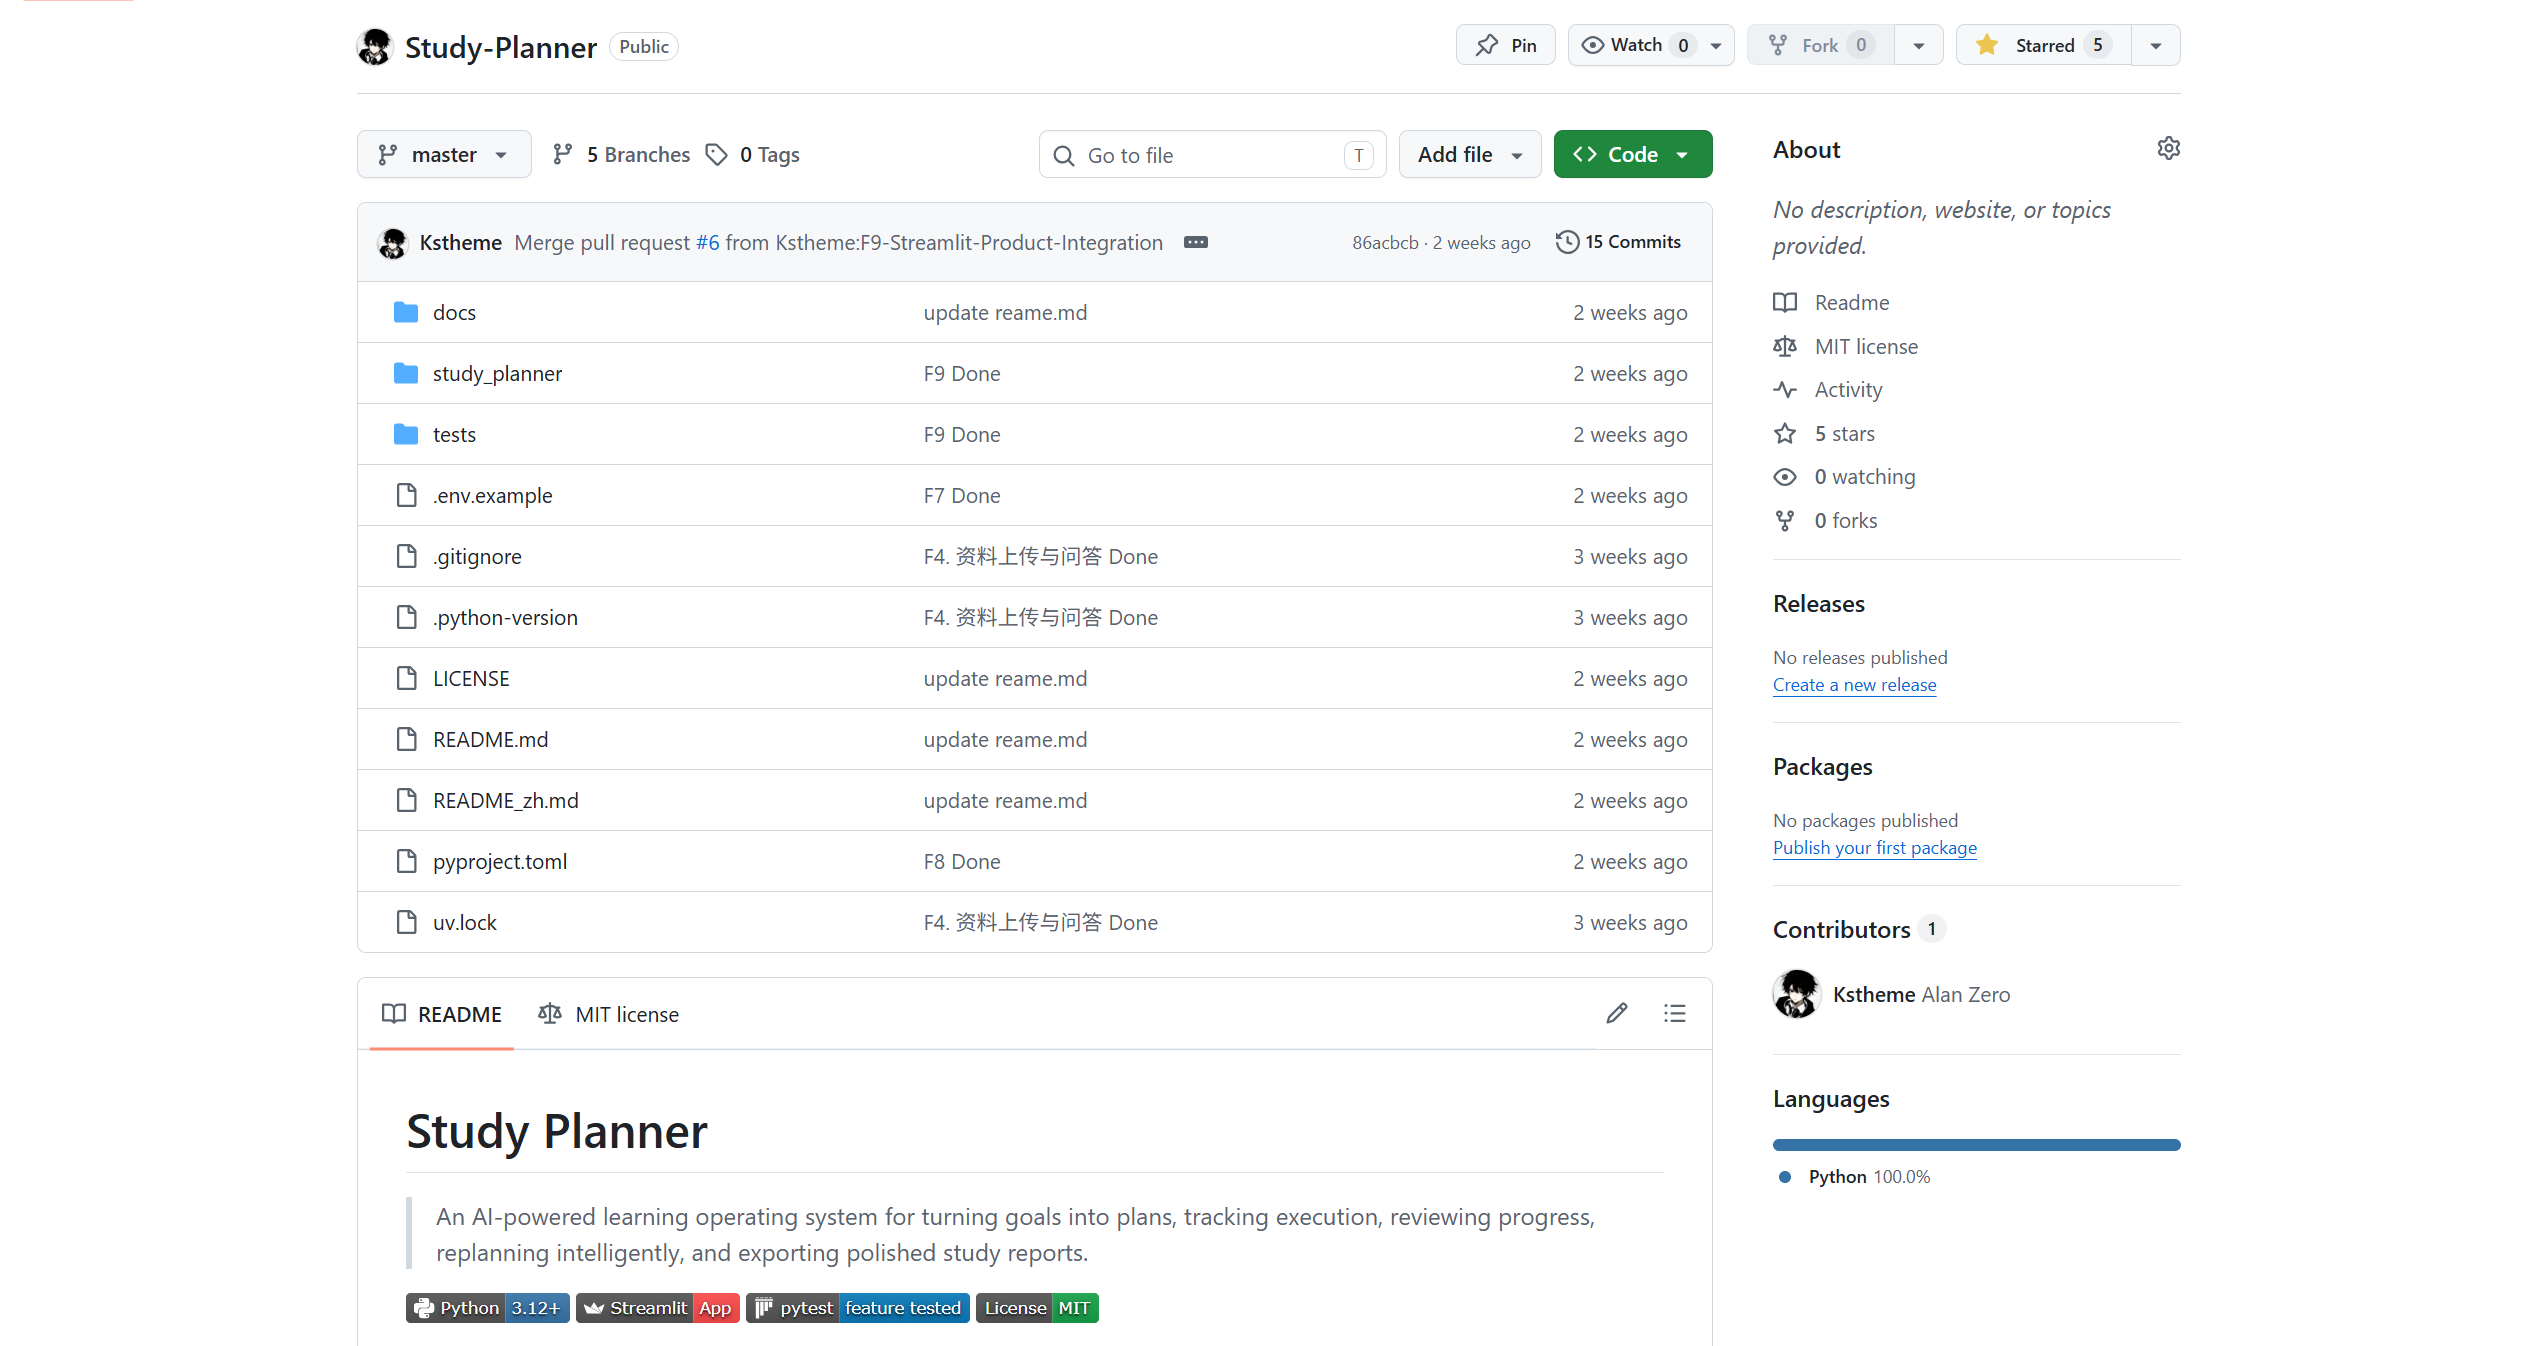
Study-Planner is an AI study plan generation tool, featuring Streamlit UI, Application Use Cases, Domain Models, Agent Workflows, RAG, persistence, and Real/Fake infrastructure adapters — a medium-complexity project perfect for practice.
The tutorial includes 10 rounds, each using a different Skill to solve one level of problem. Let's walk through it.
Round 1: Repository Overview (repo-system-design-lab)
Your Prompt:
Use $repo-system-design-lab to gradually teach me the system design of Kstheme/Study-Planner.
This round is read-only analysis — no optimization, no code changes.
Please verify if the README and docs/system-design.md are consistent with the source code, and output:
1. One-sentence project overview
2. Main modules and their responsibilities
3. Entry point
4. External dependencies
5. 5 core flows worth deep study
All conclusions must cite source code files.
What You Get:
The Agent starts reading the README, scans the directory structure, finds the entry file study_planner/interfaces/streamlit/app.py, and explores layer by layer:
- Application layer (
study_planner/application/) — use case orchestration - Domain layer (
study_planner/domain/models.py) — data models - Agent layer (
study_planner/agents/planner_workflow.py) — Agent workflow - Infrastructure layer (
study_planner/infrastructure/) — LLM, RAG, database adapters
The output explicitly marks which conclusions come from source code (Evidence), which are inferences (Inference), and which are still uncertain (Open Question).
✅ What you learn: A macro-level understanding of what the project does, what tech stack it uses, and where to look for core code.
Round 2: Architecture Map (repo-architecture-mapper)
Your Prompt:
Use $repo-architecture-mapper to analyze Kstheme/Study-Planner.
Based on source code, output:
1. A layered architecture diagram
2. A runtime / deployment diagram
3. A data ownership diagram
4. A Fake mode and Real mode switching diagram
Explain each module boundary with source code evidence.
What You Get:
The Agent scans the entire project and outputs multiple architecture diagrams (in textual form):
Layered Architecture Diagram:
┌──────────────────────────────────┐
│  interfaces/streamlit/app.py     │  ← Page rendering and user interaction
├──────────────────────────────────┤
│  application/                    │  ← Use case orchestration (GeneratePlanUseCase, etc.)
├──────────────────────────────────┤
│  domain/models.py                │  ← Data models, minimal external dependencies
├──────────────────────────────────┤
│  agents/planner_workflow.py      │  ← Agent workflow (profile→resource→planner→critic)
├──────────────────────────────────┤
│  infrastructure/                 │  ← LLM, RAG, DB, Fake/Real switching
│   ├─ llm/   ├─ rag/   ├─ db/    │
│   └─ settings/                   │
└──────────────────────────────────┘
The Agent also annotates source code locations for each layer, such as:
PostgresStudyPlanRepositoryininfrastructure/db/postgres/repositories.pyimplements the domain-defined interfaceFakeLLMininfrastructure/llm/fake.pylets you test without calling a real API
✅ What you learn: The project's skeleton and module boundaries — knowing where each layer's code lives and why it's organized that way.
Round 3: Study Plan Generation Flow (repo-flow-tracer)
Your Prompt:
Use $repo-flow-tracer to trace "configure study goals → generate study plan → save plan".
Start from the Streamlit page, trace all the way through GenerateStudyPlanUseCase, PlannerWorkflow,
Domain Model, validation logic, and persistence.
Output a call chain, sequence diagram, reliability notes, and design trade-offs with source evidence.
What You Get:
The Agent starts tracing from the Streamlit button event in app.py:
Streamlit page (app.py:85) — user clicks "Generate Plan"
  → GenerateStudyPlanUseCase (application/use_cases.py:42)
    → PlannerWorkflow.run() (agents/planner_workflow.py:30)
      → Profile node collects study goals
      → Planner node generates draft plan
      → Critic node validates and fixes
      → Output node formats the result
    → Validate StudyPlan domain model integrity (domain/models.py:120)
  → StorageService saves (infrastructure/storage.py:55)
    → PostgresStudyPlanRepository persists
Every step includes file and line number references.
You can not only understand the flow but also see design trade-offs — for example, PlannerWorkflow has an internal repair loop: if the Critic node finds issues with the plan, it triggers a retry, up to 3 times. This is a classic Agent reliability design.
✅ What you learn: A complete functional flow from UI to database, and the engineering decisions along the way.
Round 4: Agent Workflow Deep Dive (repo-flow-tracer)
This complements the previous round — instead of looking at flow breadth, it dives deep into one module.
Your Prompt:
Use $repo-flow-tracer to deeply analyze PlannerWorkflow.
Focus on explaining how the profile, knowledge, resource, planner, critic, and output nodes collaborate.
Explain the repair loop, Fake/Real LLM switching, error handling, and debug trace design.
Finally, ask me 5 questions to check my understanding.
What You Get:
The Agent dives into agents/planner_workflow.py, breaking down each node's input and output:
| Node | Responsibility | Source Location |
|---|---|---|
| Profile | Collect study goals, time, level | agents/nodes.py:20 |
| Knowledge | Retrieve relevant domain knowledge | agents/nodes.py:50 |
| Resource | Recommend learning resources | agents/nodes.py:80 |
| Planner | Generate study plan draft | agents/nodes.py:110 |
| Critic | Validate plan quality, trigger repair loop | agents/nodes.py:140 |
| Output | Format final output | agents/nodes.py:170 |
You'll also learn:
- How the Repair Loop works: Critic finds missing prerequisite annotations → notifies Planner to fix → re-validate, loop up to 3 times. If still不合格 after 3 tries, return the last result with a warning.
- Fake/Real switching: Through a config toggle, you can test the entire Workflow without calling a real LLM.
- Error handling: Each node has timeout control; a single node failure won't crash the entire Workflow.
Finally, the Agent asks you 5 questions to verify your understanding.
✅ What you learn: A production-grade Agent Workflow engineering implementation, including fault tolerance, retry, and observability design.
Round 5: RAG Flow (repo-flow-tracer)
Your Prompt:
Use $repo-flow-tracer to trace "upload document → parse → chunk → embedding/index → retrieve → LLM answer → citation".
Explain the boundaries between local services and real services,
and the roles of Milvus, PostgreSQL, and LLM.
What You Get:
The Agent walks through the complete RAG pipeline:
User uploads PDF/document
  → File parsing (infrastructure/parsers/)
    → Text chunking (infrastructure/rag/chunking.py:30)
      → Embedding vectorization (infrastructure/llm/embeddings.py:45)
        → Vector write to Milvus (infrastructure/rag/vector_store.py:60)
          → Vector retrieval on user query (infrastructure/rag/retriever.py:80)
            → LLM generates answer + citation (agents/rag_workflow.py:100)
Three storage systems, each with distinct roles:
- Milvus: Vector database, stores document Embeddings for similarity search
- PostgreSQL: Relational database, stores user info, study plans, task status
- LLM (local or cloud): Generates answers and citations
You also see the Fake mode replacements — during local testing, simple vector similarity replaces Milvus, and MockLLM replaces real model calls.
✅ What you learn: A complete RAG system data flow and component responsibility breakdown.
Round 6: Persistence and State Design (repo-flow-tracer)
Your Prompt:
Use $repo-flow-tracer to analyze Study-Planner's state and persistence design.
Focus on Streamlit session_state, StorageService, InMemory repositories, Postgres repositories.
Answer: Who is the source of truth? Under what circumstances can state become inconsistent? How should it be optimized?
What You Get:
This is the round with the most "system design" flavor. The Agent analyzes:
- Streamlit session_state: Frontend temporary state, lost on page refresh
- InMemory repositories: For testing, data disappears on restart
- Postgres repositories: Production source of truth
The Agent flags a notable design issue: a brief inconsistency window between session_state data and the database — the user sees a plan cached in session_state, but the database may have been updated by another operation.
This is a classic system design interview topic — cache consistency issues.
The Agent also suggests optimization directions: introducing a version number mechanism or WebSocket real-time sync.
✅ What you learn: State management and consistency trade-offs in real projects — must-know interview content.
Round 7: Review and Rescheduling (repo-flow-tracer)
Use $repo-flow-tracer to trace "task completion → generate review → determine if rescheduling is needed → generate adjusted plan → save".
Focus on explaining how completed tasks are protected, how adjusted plans are validated, and which failure scenarios need handling.
The Agent analyzes Study-Planner's plan update mechanism, focusing on:
- Completed task protection: Tasks marked as complete won't be overwritten or deleted during rescheduling
- Plan adjustment validation: New plans go through Critic validation to ensure prerequisite knowledge isn't missed
- Failure scenario handling: When some tasks fail, mark them as "blocked" rather than "complete," preserving context
✅ What you learn: Incremental update design — not every modification requires full recalculation.
Round 8: System Design Review (repo-design-optimizer)
Your Prompt:
Use $repo-design-optimizer to conduct a system design review of Study-Planner.
Don't modify code yet.
Find issues across 6 dimensions: performance, reliability, scalability, maintainability, observability, security.
Each issue must include source code evidence, impact, priority, optimization plan, and verification method.
What You Get:
The Agent scans across 6 dimensions and outputs a complete review table (each issue with source line numbers):
| Dimension | Issue | Source Evidence | Impact | Priority |
|---|---|---|---|---|
| Performance | RAG retrieval has no cache | infrastructure/rag/retriever.py:45 | Repeated queries call LLM again | High |
| Reliability | Repair loop has no max retry limit | agents/planner_workflow.py:85 | Could loop infinitely in edge cases | High |
| Observability | Missing structured logging | infrastructure/llm/real.py:22 | Hard to debug production issues | Medium |
| Security | API Key hardcoding risk | infrastructure/settings.py:10 | Credential leakage | High |
Every issue includes a concrete verification plan — for example, "Add LRU Cache for RAG, verify with hit rate benchmark."
✅ What you learn: How to systematically review a project's architecture quality — not just finding bugs, but scanning across engineering dimensions.
Round 9: Safe Optimization Experiment (repo-design-optimizer)
Your Prompt:
Use $repo-design-optimizer to design a safe experiment for the top 1 optimization item.
First check git status.
Then suggest a branch or worktree strategy, and output the involved files, minimum viable change, test commands,
benchmark/verification method, and rollback approach.
Don't implement yet — wait for my confirmation.
The Agent will:
- First check your git status to ensure a clean working directory
- Design a safe experiment plan — e.g., use a new branch to fix the repair loop infinite retry issue
- List involved files, minimum change scope, test methods, verification metrics, and rollback steps
- Wait for your confirmation before modifying any code
This is the most important habit: plan your validation first, then change code.
✅ What you learn: A methodology for safely conducting architecture optimization experiments — not hasty changes, but with planning, validation, and rollback.
Round 10: Reverse Teaching (repo-design-coach)
Your Prompt:
Use $repo-design-coach to quiz me on Study-Planner's system design.
Ask one question at a time.
After I answer, correct me with source code evidence.
Start from Level 1 and go up to Level 5.
Your Experience:
The Agent starts from the simplest Level 1:
Level 1 Question: Where is Study-Planner's runtime entry point? What type of application is it?
After you answer, the Agent corrects your understanding against the source code:
Your answer: The entry point is in app.py, it's a web application.
Agent correction: More precisely, the entry point is at
study_planner/interfaces/streamlit/app.py:85, and it's a Streamlit single-page application (SSP), not a traditional front-end/back-end separated web app. The key characteristic of Streamlit is that page state is managed throughsession_state, eliminating the need to write frontend routing manually. This is a key design decision behind choosing Streamlit as the prototyping tool.
The questions progressively deepen up to Level 5:
Level 5 Question: If Study-Planner needs to support 1000 concurrent users, what do you think is the biggest bottleneck in the current architecture? You need to cite at least 3 source code locations to support your judgment.
✅ What you learn: Discovering your knowledge gaps through being tested — one of the most effective learning methods.
3 Steps to Start Your Learning Journey
The 10 rounds don't need to be completed in one day. Recommended: 2-3 rounds per week, 30-45 minutes each.
Step 1: Install Skills into Your Target Project
cd your-project
mkdir -p .claude
cp -R path/to/repo-system-design-skills/claude/skills .claude/
Step 2: Enter in Claude Code
Use $repo-system-design-lab to learn this project's system design.
Start with read-only analysis, output an architecture map, and recommend 3 core flows.
All conclusions must cite source code files.
Step 3: Begin Your First Round of Learning
The Agent will start from the README, progressively scan configuration files, directory structure, and code entry points, then output source-code-supported architecture analysis.
08 Summary
Many people fall into the same trap when learning system design:
You read books, memorize questions, look at others' architecture diagrams, but you've never systematically analyzed the code you wrote yourself.
The value of Repo System Design Skills isn't about how intelligent it is — it's about establishing a reusable, methodology-backed learning framework.
- It transforms Agents from "helping you write code" to "teaching you to understand code";
- It transforms learning from "hear and forget" to "traceable evidence with practice and testing";
- It transforms system design ability from "interview cramming" to "daily accumulation."
Next time you take over a new project, don't rush to write code.
Spend 30 minutes understanding its architecture with this Skill set first. What you learn won't just be this project — it will be the ability to understand any project.
Discussion Question
When learning system design, is your biggest challenge not understanding source code, not finding a learning path, or not knowing how to articulate it in interviews?
References
- Repo System Design Skills (GitHub): See the current repository
- Kstheme/Study-Planner: https://github.com/Kstheme/Study-Planner
Copyright
Copyright Ownership:
License under:Attribution 4.0 International (CC-BY-4.0)